Fox Applique Tutorial and Pattern

This post is waaaaaay overdue, and I’ve been trying to work on it for months. I think I made my fox tee back in April. I don’t have any absolutely amazing photos of it, as creative documentation and I are sort of at odds with one another these days. I’m just excited to finally be sharing!

I’m gonna give a special shout out to my husband, who saved me from the pit of PDF-sharing ignorance and despair. And I’m dedicating this post to Mimi, who never gave up. 

Now that the credits are out of the way…

I give you the fox applique tutorial and pattern. You may remember this design from my *ahem* award-winning version of the Archie Doll.

Image


1. Print and cut.

If you’re making your own tee, the pattern I used is Dana’s Basic Tee. You can find my fox pattern here

Image


I did not include a pattern for eyes and a nose, but you guys should be able to figure that out. They’re just circles and a rounded triangle. 

Oh, and I should say that I did this applique with knit, so, when sewn, the edges will be left raw. And I sewed my applique onto my tee front *before* I assembled it, so that my t-shirt and sewing machine wouldn’t get into a fight. And use a ball-point needle!

2. Determine your placement and start sewing.

I don’t have pictures that get really specific about this, but pin on your first layer (the orange fox face), and sew the edges first. Then layer the whiskers and do the same thing. Now, I placed my whiskers a little high for my tastes, I meant to place them flush with the bottom of the fox face. So that’s the one change I’d make if I were doing this again. 

Image


3. Sew on the eyes and nose.

Image


4. Sew on the white ear pieces. And throw on some eyebrows for good measure.

Image

Then, if you’re making your own tee, assemble it. Boom, you’re done! 

Image


My shirt looks a little weird because I scaled up the pattern to a 5T, but I forgot to make the arms bigger. It doesn’t look as weird when Dex is wearing it. But if you resize a pattern, just remember to resize all the pieces!! 

Image


Dexter has worn this shirt like crazy for the past few months, mostly because I put it on him every single time it’s clean. 

I’d love to see if anyone recreates this! And, as usual, I’m cool with this being used for personal use, but not for monetary gain. 

Postage Stamp Quilt-Along Update

I’m a little behind on my post this week. I was stressed out about it because I thought I’d solved all my technology problems from the past few weeks. I was wrong. I think technology hates my blog. I was so mad the other day that I almost swore off blogging. But my husband helped put things into perspective: “No one is wailing and smashing their computer because you haven’t posted in time. They’ll see it when they see it.” Oh, Alex, you keep me grounded in reality. My response was, “Well, they *should* be.”
But, I’m still here, and (dare I say it??) think most of my tech problems are solved.

I’m excited to say I have already completed my February Postage Stamp Challenge! I solemnly vowed to sew all of quadrant 1 into sets of 4.

Sewing is done.

And ironing is done.

It was pretty awesome to iron these out. I started getting a feel for how things are going to look!

There were some sad ones. Several are like the one below, where the seams just don’t quite match. I didn’t have any tragically off-kilter ones, but I’m a little concerned about how it might throw things off. Of course, I’m worrying too much about it..

And I found a fabric I sewed on backwards. It’s the orange in the upper right. I *almost* took it apart to flip it, but I realized that it just doesnt matter and that I may like the backside better anyway.
And then there’s this bad boy… He’s more than a little snaggle-toothed. I am going to see if this block can be salvaged, but I suspect I will have to take it apart and maybe replace a couple of the squares. It might be for the best, all those lines going in different directions make me a little nauseated and anxious lol.

But overall, I was really pleased with how they look. I definitely have some favorites! The one below just makes me really happy for some reason.

A few produced some color combos I’d never really considered. In the future, I may look to these for inspiration:

I really liked this one with the frog.

I definitely have a weakness for aqua, red, and black together. All my favorite blocks turned out to contain green/aqua, red/orange, and black and white!

Now I’m going through and squaring up all my blocks. Does using a rotary cutter make everyone’s elbows burn, or am I doing something wrong??

Bring on March’s challenge, Mary!! I’m ready!


Felt Piglet Tutorial

We’re having a Winnie the Pooh craze around here. Craze may be putting it a little strongly, but Dexter is frequently Pooh, pretending to suck honey off his hand and telling me he’s spitting out bees. He asked the other day if I’d make him a piglet… so I paused for a half-second and said, “Sure!”

If you’d like to use the exact pattern* I traced out, here it is:

 
I’ll show below how to assemble him and how I drafted my pattern.
*1. Where the body meets the legs, use the top pink line. The lower one was a mistake I didn’t remove. *2. My pattern is not symmetrical. It just didn’t occur to me until it was too late. This will be most obvious on the ears, the inner parts need to match the correct ear, unless you care to correct that on your pattern.

You can do this with any character really. Piglet is pretty simple in that he’s almost entirely made up of 2 colors. I found a picture online, blew it up to the size I wanted, printed it… and realized it wasn’t quite as big as I’d expected. So I roughly traced around it to enlarge it.

IMAG0218 (1)

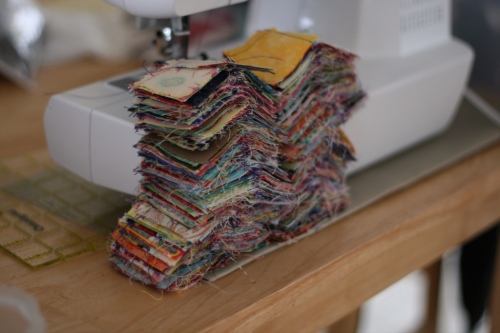
You can see that I did a lot of correcting throughout the whole process. I was flying by the seat of my pants and really didn’t spend anytime in the planning phase! But all of these corrections should be reflected in the PDF pattern.

I folded over my felt and traced the pattern onto the side of the fabric that would be on the inside. Then I cut out both layers together.

       IMAG0219 IMAG0220 

Next, I went scrounging for fabric for clothing. I didn’t want to have to hem anything, so I used only felt and t-shirt scraps. I didn’t have any dark pink, and I felt like he just HAD to have stripes. I figured purple would work too. It’s a warmer purple than it looks in all these pictures.

IMAG0222     
So, lay Piglet down where you’d like the stripes to fall. Again, fold your fabric, with the wrong sides facing out.

I used a Sharpie to mark the points at his neck and crotch, and then traced the sides of his tummy.

       IMAG0223 IMAG0224

You’ll get a an outline that looks like the picture on the left (if you do it without the pattern I linked). Then just connect all the lines, making a dip at the top for his chin.

       IMAG0225 IMAG0226 

Then I turned all the pieces right-side-up and started building Piglet.

IMAG0229

Cut out all the facial features. He’s starting to look pretty cute! Also, he looks a little broader than normal, but when he’s stuffed, it turns out just right.

IMAG0230

Sew on all the dark pieces.

IMAG0232

Next, layer the snout.

IMAG0233

Then add the little nose triangle.

IMAG0234 
Then sew the clothes to the front and the back. Remember, you have not put him together yet, your back piece should still be separate from the front.

       IMAG0235 IMAG0236

Flip the sides and trim off any excess t-shirt fabric. You’ll want to check the front side after you do this and make sure you trim the parts you can’t see from the back.

IMAG0237 
Now you create your Piglet sandwich (hmm…) and sew around the outside, starting below one ear, and ending at the bottom of the next ear.

IMAG0238
 
Piglet’s head should be floppy and open like this:

IMAG0239 
Stuff the arms and legs first, leaving it slightly soft where they connect to the body, so that he won’t be completely stiff. Then talk some little kid into stuffing the rest for you. Actually, he got tired of this pretty quickly and I had to finish. He just wanted to shred the stuffing.

       IMAG0241 IMAG0242

Then I stitched across the arm joint to give them a little range of motion. I didn’t bother doing this with the legs, but you’re welcome to try if it pleases you.

IMAG0245 
Round the Polyfil at the top, keeping it clear of where seams will be. I didn’t put any stuffing in the ears.

IMAG0247 
Sew around the curve of the head, still ignoring the ears.

IMAG0248 
Pin the pink parts onto the ears. Keep in mind that if you used my pattern, the ear parts are not interchangeable.

IMAG0250
Sew around the edge of the dark pink, both attaching it to the ear and closing the ear openings.

IMAG0251
Then trim off the threads and he’s good to go!!

IMAG0252
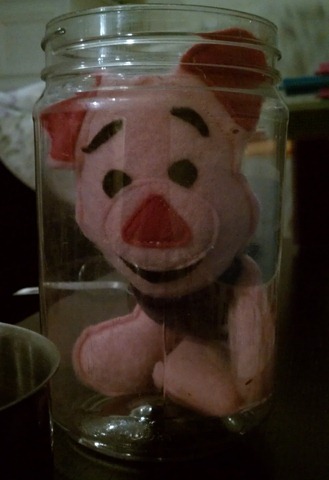
The first thing Dex did was cram him down into a jar. Poor Pickled Piglet.

IMAG0260
And he felt like he needed to compare the pattern to see if they matched up.

IMAG0263

He now sleeps with Piglet every night, which is awesome. I should add that felt starts to look a little ratty when it’s handled by sticky hands everyday. Just a heads up.

There are lots of steps, but this was a pretty quick project. All told, it took me about 2 hours to complete, including drafting the pattern and taking pictures.

I’d love to see if anyone comes up with any other characters! I hope to make a Winnie the Pooh sometime! But then I’d probably lose it and end up making the whole Winnie the Pooh family. Felt is dangerous!

Postage Stamp Quilt Progress

We’ve been having a crazy couple of weeks! In order to de-stress, I finally started working on my postage stamp quilt. I finished cutting all my pieces… 3584 to be exact. Here they are all sorted and bagged into quadrants.
IMG_8680

I’m sewing duos right now, keeping them all strung together until I’m ready to iron them. IMG_8681

IMG_8682

IMG_8687

Pairing my little squares has been a lot of fun! I know Mary at The Curious Quilter keeps hers pretty random. Unfortunately, had A LOT of duplicates, so I was a little picky about how to pair them. My goal is to keep duplicates from touching, and hopefully to keep fabrics that are very similar from touching. Plus, as I was pairing them up, I really liked the idea that each fabric would have a coordinating buddy in the all the chaos!

Because of all the duplicates and my vow to keep them apart, I’m having to go about the whole thing a little differently. I’m going to use Mary’s Classic Squares Tutorial as my piecing guide. but I’m doing all my duos in a quadrant first, then I’ll probably lay them all out and sort them into individual 64 square blocks, to try to spread out the duplicates. Tip: Take it from someone who now knows better- duplicates in a postage stamp quilt cause problems!! I now believe it’s better to have as many unique squares as possible, unless you are striving for a controlled pattern in your quilt.

Make Your Own Chalkboard

I have been wanting a chalkboard so badly, pretty much ever since Pinterest showed me how cool they are (peer pressure!). You can’t find them anywhere, unless you’re willing to order one online. And I really wasn’t. I’m never on the front end of a fad, and I’m not about to shell out much money for one now :).

So I started looking into making my own. Hence this tutorial. I’m gonna show you how to make your own chalkboard using chalkboard spray paint.IMG_8526

This works especially well if you’re creating a big chalkboard and are worried about keeping things smooth and even. There are other forms of brush-on chalkboard paint out there, and I considered them, but I was really worried that I’d make a mess of it. When I stumbled upon Rust-Oleum Chalkboard Spray Paint, I knew this would be my best bet. Now, I felt a little guilty, because I’d been reading Superfreakonomics, and I was in section about global warming, and I don’t know if spray paint is amazing for the environment. But I’d already bought it when it occurred to me, and I really really REALLY wanted my super cool chalkboard. So if you’re already ok with spray paint, go for it, if not, there is a tutorial for making a chalkboard with brush-on paint here.

1. Find your surface. I stumbled upon an old whiteboard in our garage, and I was super pumped. The frame was ugly, and if it starts to bother me I will paint it or reframe somehow, but I could not have found a better surface for my project! And it’s a good size, around 23”x46”.
IMG_8518

Clean the surface as well as you can. You don’t want any dirt or lint under your paint.

2. Protect your frame. Pitiful as mine may be, I still covered the frame with tape.
IMG_8519

3. Prime your surface. Just how imperative this step is, I do not know. But the guy at Home Depot recommended I do it, and I really didn’t want to waste my time and chalkboard paint, only have have it chip off. If you use a whiteboard like I did, the surface is going to be slick. Better to be safe than sorry! I used Rust-Oleum Painter’s Touch Ultra Cover Primer in gray.
IMG_8520

Tips:

  • Spray outside or in a well ventilated area!
  • Put down a drop cloth if you care about the area you’re spraying in.
  • TAKE THE WIND INTO CONSIDERATION! I did not think about that, as I was spraying in my open garage. The day was very windy. I walked away and came back to my drop cloth on top of my board, which was also covered in a nice layer of dirt. Thankfully, it didn’t mess up the finished product, but it did cause me some panic.
  • If you’ve never used spray paint, it’s going to look crazy and splotchy at first (see above), but don’t worry, keep going back and forth as evenly as you can and you will cover the whole surface (see below).
    IMG_8521

3. Apply your chalkboard paint. There are special instructions on the can for the chalkboard paint. You apply one coat, then 2 more light coats a few minutes apart. You’re then supposed to do this a second time, either within 1 hour or after 24 hours. I didn’t see the instruction about the “2 more light coats a few minutes apart.” I just waited about 20 minutes after the first coat and did a second one. And my chalkboard is fine.
IMG_8522

4. Be patient while your board dries. I only waited a couple of hours because I was too excited. The can says it’s dry to the touch after 1 hour and fully dry after 24 hours.

5. Peel off the tape. This was probably my favorite part because I love how you pull off the messy tape to reveal the crisp, beautiful finished product!

6. Go crazy-town on your new chalkboard!

IMG_8536

Link: Training Pants Pattern

IMG_6117

Occasionally, I trip around my WordPress dashboard, noting sporadic spikes in readership. Usually those are from mentions here and there on fellow bloggers’ pages. But, taking a look at my data just now, I discovered that someone has does something WONDERFUL with one of my tutorials.

Amber at Mom Road has created a pattern based on my Training Pants Tutorial! I can’t thank her enough, because I keep promising that I will gain the ability to produce patterns, and I never do.

I plan to print out her pattern and size it for Dex, because *whisper* I never even got around to making a pattern for myself! I just kept my ruined prototype pieces. So there is my confession of the day: I never officially used my own training pants because the knit was too tight and I got discouraged and never modified them! Any wonder why I never put out patterns Winking smile ?? Thanks so much, Amber!!

WIP: Postage Stamp Quilt (Cutting and Calculating!)

IMG_8098

Isn’t this project supposed to be a scrap-buster? What am I doing bringing new fabrics into this house??

I cleaned out my tiny scraps and had only 450 of my proposed 4096 squares. And I get a little impatient sometimes, and do impulsive things. I went to Joann’s looking for Thomas fabric for a birthday gift. I didn’t find any Thomas the Train, but I did find LOTS of fabrics that would look great in my postage stamp quilt.

My rationality: I planned on getting a few fat quarters. But it occurred to be me that 4 fat quarters would come out to $8. so, why shouldn’t I just get lots of 1/8 and 1/16 cuts of lots of fabrics for the same price? Yes, this is very sound logic indeed.

But it turned out to be a great choice. For $5.50 I got 13 different fabrics (just over 1.25 yards) as opposed to 4 for $8 (1 yard).

IMG_8102 
I loved all the fabrics I chose, but I was really excited about a few. This green fabric was around 60% off because it was a St. Patrick’s Day print. Awesome!!!

IMG_8101 
Novelty fabrics were 30% off so I threw in some mushrooms and owls! (BTW, somewhere along the line, I decided this quilt is definitely for me. I’m apparently not interested in sharing a “Big Hug”.)

IMG_8099
I fussy-cut the owls, which is something I’ve always wanted to do! But, as they were almost 2 inches tall, they’ll still get a little cut off at the edges.

So I’ve been cutting up a storm, between other projects, “cleaning” (ha!), and going to birthday parties (2 this weekend). And I’ve now reached 1104 pieces. Proof:

IMG_8119

IMG_8117

I’m doing my calculations right on the box, lest I lose them and become desperate and frustrated later. It’s a lot of gibberish, but I know what it means. For now… (Update: I took down the picture of my “calculations” because something was way off.)

My quilt will be roughly 74”x90”, modeled after a quilt that I already use all the time. I’m currently planning to do 1/4 seams, because that’s what I normally do when sewing, unless a clothing pattern calls for something different. So that means my finished squares will be 1.5” instead of 1”. After all my calculations, I will need 2296.875 squares… as you can see, my calculations still need to be tweaked 🙂 (Update: I have done some crazy-bad calculating it seems… As Mary says on her blog, you should have 64 squares per 12” block. For some reason I came to the conclusion that she was using 1/2” seams, but she is also using 1/4” seams. NEVER TRUST MY MATH 😛 ) But I’m excited to have a semi-functional plan!

Postage Stamp Quilt (Am I Crazy???)

IMG_8077 

I’ve always wanted to do a block quilt, possibly out of 4” squares… sometime in the distant future, because that would take forever, right??

But then I saw this beautiful postage stamp quilt over at The Curious Quilter, made of 2” squares, and I felt I must rise to the challenge.

I told the creator (borrowing from her comments section):

“one of my favorite parts of the process is dreaming up my new creation. i do enjoy piecing (by machine) but i don’t enjoy the technical planning stage (figuring out how much fabric i need and how big everything needs to be), it just seems like it takes all the fun out of it. i just want to create!!!”

And she replied with this great advice for getting started:

“Thank you! Actually this is a great project for you then. Every time you make something, cut yourself a few two inch squares. When you have a pile, start sewing them into squares of 64 each, for a 12.5 inch block. You can assemble blocks using the Classic Squares Tutorial, but with two inch squares instead of ten inch ones. Over time, you will build a healthy pile of blocks!”

So I recently got started! I cut up tons of scraps into two inch squares while I was watching tv. (Got to love a simple, mindless task!) After a while I thought maybe I had enough for about half a quilt. I counted my squares… 420.

I checked Mary’s blog again to see how many squares I’d need. And I realized I didn’t pay enough attention before. That beautiful quilt is made up of 4096 pieces!!!!

At least I’ve made a dent 🙂

Anyone up for a quilt-along? If so, hop on over to The Curious Quilter and check out her postage stamp quilts. She calls them “Big Hugs”, and really, after that much work, that is exactly what they are! And the quilts can be very personal, made up of favorite fabrics or bits of old, well-loved clothing.

She also has great storage tips for all those teensy squares.  Don’t do what I’m doing… you can see mine are all thrown into a box and that I didn’t even iron the fabric before I cut it.

The Transformation of Mr. Hunny Bear

Dexter has finally chosen a comfort item.

When I was pregnant, my husband sent me a beautiful (and yummy!) fruit bouquet for Valentine’s Day. A soft white bear happened to be attached, so I just added it to the tiny but growing basket of Dexter toys. In the first 21 months of his life, he barely paid attention to it.

Then he became socially  aware.

He now recognizes that his cousins, Ty and Micah, sleep with bears. One day we were talking about it while I was rocking him (Actually, I was singing about it. Yes, we have a Ty and Micah song.) and afterward Dex really wanted a bear to sleep with. I pulled out the girly white bear and he has slept with him ever since.

A few days later, we were having lunch with my friend, Lisa, and her daughter, Alex. Alex’s favorite toy is a bear named Sunny. Dexter was really excited about “Sunny Bear”, and talked quite a bit about her. And eventually he started calling his own bear Hunny Bear.

Since the attachment is growing stronger, I decided I’d risk ruining Hunny Bear early on in order to make him more boyish. And less dorky. Let’s face it, random bears that come with bouquets aren’t made with aesthetics in mind.

Here is Hunny Bear’s journey:

IMG_7983 

Meet… Anya.

IMG_8022

I really think my least favorite part is the ugly floral embroidery on the foot. But we’ll get to that. Easiest first step: Lose the bow!

IMG_7984

What I really wanted to do next was get away from the white fur. If this becomes Dexter’s permanent buddy, white is going to look gross fast. I was hoping to warm it up to a honey tone, but a few things were in my way. 1. I know almost nothing about dying. I knew the tone I wanted, and I knew it needed to be child-safe. But I didn’t really know what would work on the mostly synthetic fur. Which leads me to my next point… 2. I am IMPATIENT and I wanted to start dying NOW. So my options were pretty much limited to a tea bath.

I boiled a bunch of tea bags, added some vinegar for good measure, and gave Hunny Bear a bath. Dex enjoyed watching the process from his high chair 🙂

IMG_7994(Ok, so I just took one picture of him, and it only proves that he enjoyed playing with the discarded ribbon and playing with his ears, and that I haven’t cleaned off my dining room table in a while… but I promise, he enjoyed watching Hunny Bear get dyed!)

Poor Hunny Bear really went through a lot. I hope for his sake that Toy Story isn’t true.

The pre-dye soak:

IMG_7996

Into the boiling hot water:

IMG_7997 

The “Poor Wet Rat” stage (btw, THIS is the color I hoped he’d be.):

IMG_7999

Rinsing and wringing:

IMG_8001

IMG_8002 

After this, I realized that the dye was just barely taking and that the tea bits were not going to come out of the fur with a hand rinse. I think Dexter’s favorite part of the whole process was to personally throw Hunny Bear into the washing machine 🙂

While he was washing and drying, I made a tie. If I had to do over, I’d research the actual proportions of ties and plan the length a little better. But remember the impatience we discussed earlier? I decided to just go for it. I cut a folded length of fabric into the approximate shape of a tie.

IMG_8003

I didn’t want to put a lot of effort into it, and I didn’t mind if the tie frayed, so it is just a single layer.

I unfolded the tie and machine-stitched around the edges. I did two rows to help ensure that the fraying didn’t get entirely out of control. I really like the way it looks!

IMG_8006

After failing to understand several diagrams, I used a tutorial video to learn how to tie my necktie. I stitched at the knot so the necktie wouldn’t come off.  I think, since I made a weirdo little tie, that it almost looks more like a scarf than a necktie. But it’s way better than that purple bow.

IMG_8009

After he was dry, I could tell the dye was just *almost* a waste of time. But at least now he is a gentle vanilla shade instead of stark white. So ultimately it was worth the effort.

Dexter was happy to see Hunny Bear again and didn’t seem to mind the new changes.

IMG_8016

Phase Two involved covering all traces of purple. I used scraps of chocolate brown fleece to patch over the nose and feet. So so cute!!!! This was my favorite change!

IMG_8019

IMG_8021

One last step… Goodbye forever, Anya!

IMG_8023

And officially hello, Hunny Bear!!

IMG_8025

Tutorial: Easy Robot Appliqué

IMG_7760

This story begins with a Bert and Ernie marathon. My son loves Ernie and talked us into watching probably 30 clips on YouTube before nap. He’s very persuasive 🙂

I started thinking how cool it would be to surprise him with an Ernie shirt, and in my search for Ernie inspiration, I stumbled across an awesome it’s-already-been-done tutorial over at MADE. It’s almost exactly what I was hoping to do! But I realized that I didn’t have all the colors I need, and I’m also hoping to do some textures, especially in the hair. So we’re shelving Ernie for later.

But I still had the crafting itch, and it’s been a while since I’ve made something for our family. I’ve been on a steady diet of car seat ponchos (separating zippers, AAAGH), so I really needed something to cleanse the palate.

Dexter has also been deeply immersed in a robot craze, so it didn’t take long for me to change directions.

Step 1: Sketch an awful picture of a robot that you will quickly scrap.

IMG_7698

Step 2: Cut out trapezoids for the head and body, rectangles for the legs and feet, and then shapes for the arms and hands. I used a pincher-type hand, and then I wanted the arms to broaden near the hands. The fabric I used was gray t-shirt scraps.

IMG_7701 

Step 3: Place and pin the pieces. I liked the way the pieces didn’t quite touch.

IMG_7702 

Step 4: Sew around the edges of the  pieces. I used a black thread, about 1/8” away from the edge. I didn’t use backing, adhesive, or stabilizer, but it might make it  easier to keep the pieces in place if you’re nervous. I didn’t take pictures of the sewing process, so hopefully that’s pretty simple to figure out. Just remember to not sew through all the layers!! You want your shirt to be wearable 🙂 I know this sounds obvious, but it’s exactly the sort of thing I might do without thinking. My robot is still messy in this picture, but eventually clip the threads.

IMG_7704

Step 5: Add features! You can use buttons, fabric, stitching, or paint. Be creative! I took a minimalist approach and I love it! I love that I had a deep red button to sew over the “heart” area 🙂

IMG_7708

IMG_7709

When Dexter saw the shirt this morning, he cheered, “Robot!!!” and I knew it was worth the work 🙂

My little photographer was pretending to take pictures of me with the lens cap. He kept saying, “Cheese!!”

IMG_7717

IMG_7720

I also like how keeping the pieces separated allows the robot to have a little movement. It’s funny how he looks slumped over when Dex is sitting 🙂

IMG_7731

IMG_7733

Dexter is not a fan of photo shoots these days. Even though I don’t force him to do anything, besides stand at least 10 feet away from me, there is something in him that just makes him resist  having pictures taken. It must be the genes he got from his dad!! Here’s where we had to break so he could crawl at me, growling like a monster.

IMG_7755

IMG_7756

And then he rests…

IMG_7759